There are two steps to create a module project:
-
Create a Modelio Studio project
-
Create the module’s project in the Modelio Studio project
Create the Modelio Studio project:
-
Open Modelio
-
Open the "File" menu and choose
 "Create a project"
 -
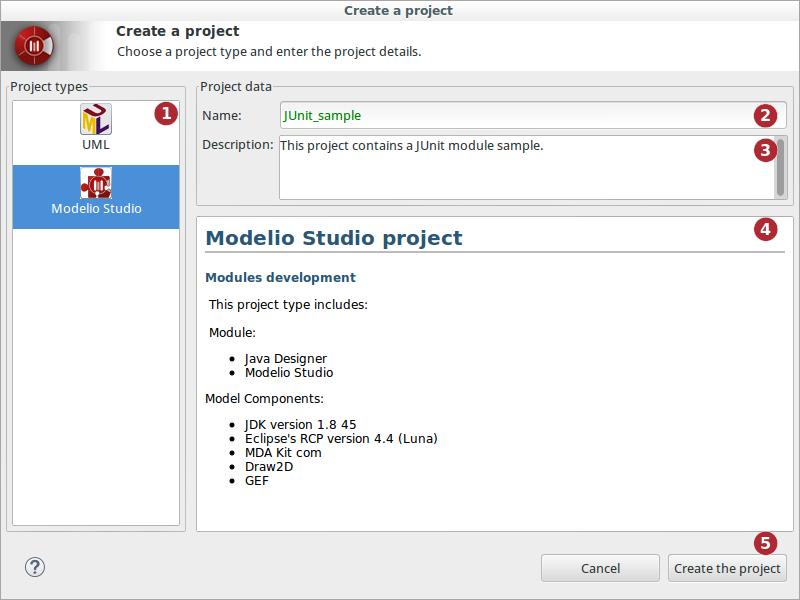
In the Create a project dialog box:
-
Select the
Modelio Studioproject type. -
Enter
JUnit_sampleas project name. -
Enter the following text for the project’s description: ‘This project contains a JUnit module sample.’
-
-
The chosen project type will automaticaly include modules and model components. The modules and model components list are detailed here.
-
To finish, click on "Create the project"
Create the module’s project
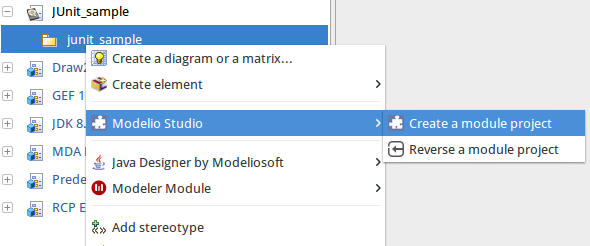
The Modelio Studio project is created and open. Now the module’s project needs to be created:
On the junit package (under the JUnit_sample work model), open the contextual menu and select:
 "Modelio Studio" –> "create a Module Project".
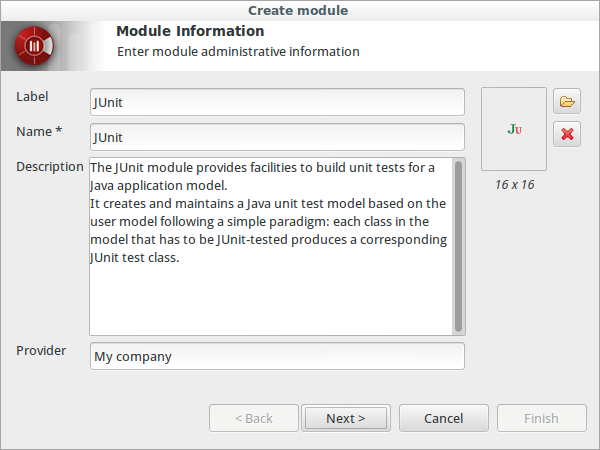
Module Information dialog box
Enter the module administrative information.
-
Label: Enter the module name. In our case, it is "JUnit". Note: This name is used for the jmdac filename.
-
Name: This field will be filled automatically
-
Description: Enter the module description:
The JUnit module provides facilities to build unit tests for a Java application model.
It creates and maintains a Java unit test model based on the user model following a simple paradigm: each class in the model that has to be JUnit-tested produces a corresponding JUnit test class. -
Provider: Enter the provider. For example: My company
-
Icon: Select an 16x16 icon.

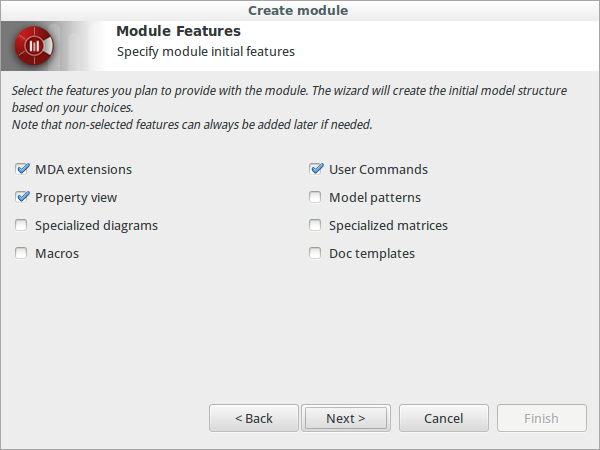
Module Features dialog box
Select the features that will be available for the module.
Note: The non-selected features can be added later
Select the following features:
-
MDA extensions
-
Property view
-
User Commands
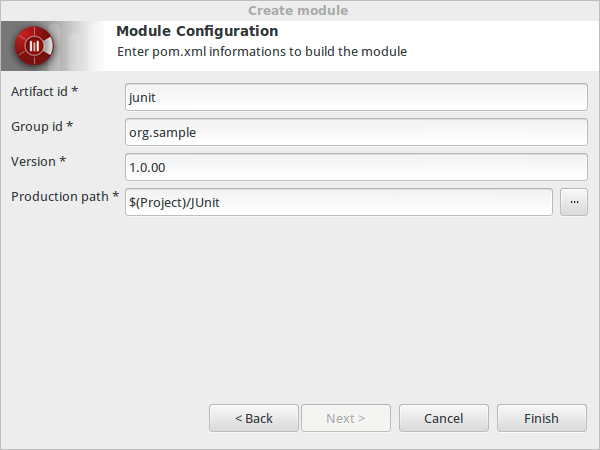
Module Configuration dialog box
-
Artifact id: junit
-
Namespace: org.sample
-
Version: 1.0.00
-
Production path:
$(Project)/JUnit(leave the default value)